How to Wrap Trees With Outdoor Lights: A Step-by-Step Guide
Wrapping trees with outdoor lights is a timeless way to create a festive and enchanting ambiance for the holiday season. Whether you’re decorating your front yard or setting the mood for an event, properly wrapping trees ensures a stunning display. Here’s a step-by-step guide to help you wrap your trees with outdoor lights effectively and safely.

What You’ll Need:
- Outdoor-rated string lights: Choose LED or incandescent lights that are labeled safe for outdoor use.
- Extension cords: Make sure they are weatherproof and outdoor-safe.
- Hooks or clips: Optional but helpful for securing lights.
- A ladder: If wrapping tall trees.
- Timer or smart plug: To automate lighting schedules.
Step-by-Step Instructions
1. Plan Your Design
Before starting, decide how you want the lights to look:
- Full Trunk and Branch Wrap: Ideal for larger trees to create a dazzling effect.
- Spiral Wrap: Great for wrapping the trunk only or small trees.
- Hanging Lights: Perfect for creating a cascading look with dangling strands.
Tip: Take note of the tree’s height and width to estimate the number of lights you’ll need. As a general rule, use 100 lights for every 1-1.5 feet of tree height.
2. Test Your Lights
- Check functionality: Plug in all light strands to ensure they work before starting.
- Replace damaged bulbs: Swap out any non-working bulbs.
- Untangle cords: Straighten your light strands to make wrapping easier.
3. Start at the Base
- Plug it in: Start wrapping from the power source (extension cord or outlet). Keep the plug accessible.
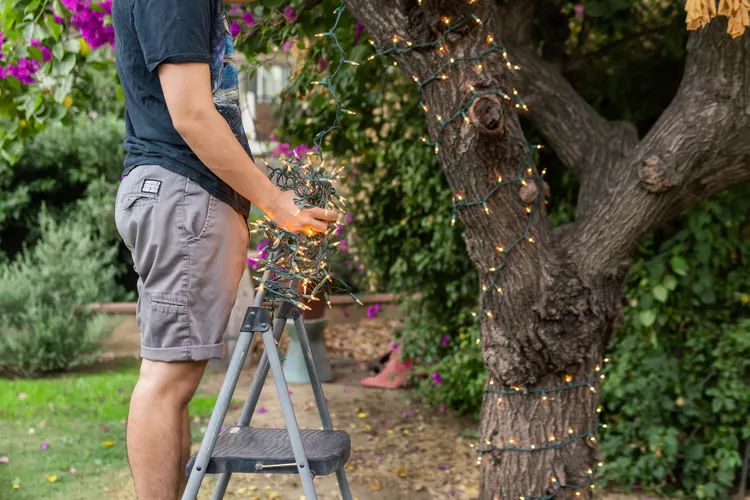
- Wrap tightly: Begin at the bottom of the trunk and work your way up, keeping the lights snug but not so tight that they damage the tree.
Tip: If you’re using multiple strands, connect them securely to prevent gaps in lighting.
4. Wrap the Trunk
- Spiral upward: Wrap the lights in a spiral pattern around the trunk. Maintain even spacing between each wrap to create a uniform look.
- Overlap slightly: For more brightness, overlap the strands slightly as you ascend.
Tip: Use zip ties or clips to secure the lights if needed, especially for smooth or irregular bark.
5. Move to the Branches
- Start with larger branches: Once the trunk is done, extend the lights onto the main branches.
- Wrap outward: Begin at the base of each branch and wrap toward the tip. Reverse direction and wrap back toward the trunk if the strand allows.
- Leave room for flexibility: Avoid pulling the lights too tightly around the branches to prevent breakage.
6. Secure and Connect
- Anchor the ends: Use hooks, clips, or ties to secure the ends of the light strands.
- Hide the wires: Tuck away any excess wires to maintain a clean appearance.
- Connect strands carefully: Ensure all connections are tight and weatherproof.
7. Test the Final Setup
- Step back and check: Turn on the lights and view them from a distance to spot any uneven areas or gaps.
- Adjust as needed: Reposition the lights to fill in dark spots or create a balanced look.
Safety Tips
- Use outdoor-rated lights and cords: Ensure all lighting components are designed for outdoor use.
- Avoid overloading outlets: Use power strips with built-in circuit breakers to prevent electrical hazards.
- Securely fasten lights: Prevent lights from falling or becoming tangled in wind or weather.
- Unplug before adjustments: Always unplug the lights when making changes to the setup.
- Waterproof connections: Use weatherproof connectors or tape to shield plugs from rain or snow.
Creative Ideas for Tree Lighting
- Color themes: Use white lights for a classic look, or mix colors for a fun, vibrant display.
- Twinkle lights: Add motion with twinkle or animated lights for a dynamic effect.
- Layered lights: Combine mini lights with larger bulb strands for depth and dimension.
- DIY tree top: Create a starburst or glowing topper for the tree using additional strands.


